


I’m not sure how, but my kids are better at working my iPhone than I am. Even Lincoln, my one-year-old, knows how to swipe and tap enough to find my photo album on my home screen. But with that seemingly built in ability, comes the ever-growing threat of accidental deletion of pictures or in-app purchases. I just want my phone to entertain my kids so I don’t have to…is that too much to ask? Ok, ok, I’m just kidding, as my kids get little to no screen time…but there has to be a way to kidproof your iPhone a little, right?
 Image courtesy of Witthaya Phonsawat at FreeDigitalPhotos.net
So I did a little research and found the solution. Did you know you can deactivate parts of your iPhone screen so that your kid can’t delete or go to a page he’s not supposed to? I took some screen shots to show you exactly how to do it. It’s a bit of a process at first, but I’ll show you how to make it a shortcut so all you have to do is hit your “Home” button three times to activate the control.
Here’s what you will need to do JUST ONCE {to get it set up}:
1. From your home screen, click on your “Settings” button {it looks like a gear}
2. Scroll about halfway down and click on “General”
3. Scroll about halfway down and click on “Accessibility”
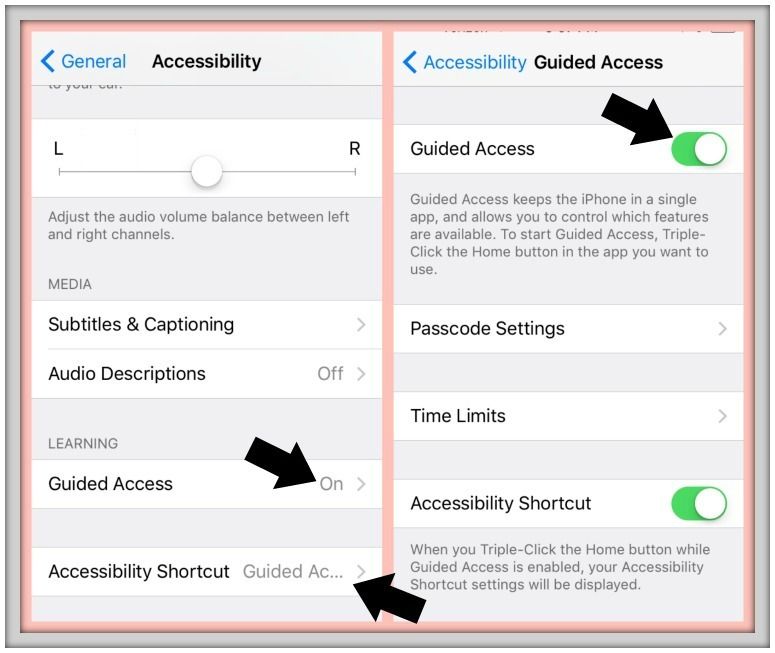
4. Scroll all the way to the bottom of the screen. Make sure that it says “Guided Access” next to “Accessibility Shortcut” {see at the bottom of the lefthand picture above}. This is what makes the controls turn on when you hit the “Home” button three times….it’s a shortcut.
5. Just above “Accessibility Shortcut” you will see “Guided Access”. It should say ON, but click on it anyway, and then make your screen look like the picture to the right above. You’ll also want to click on “Passcode Settings” and set a password for yourself…I kept mine very simple and easy to remember.
Here’s what you will need to do before your child uses an App.
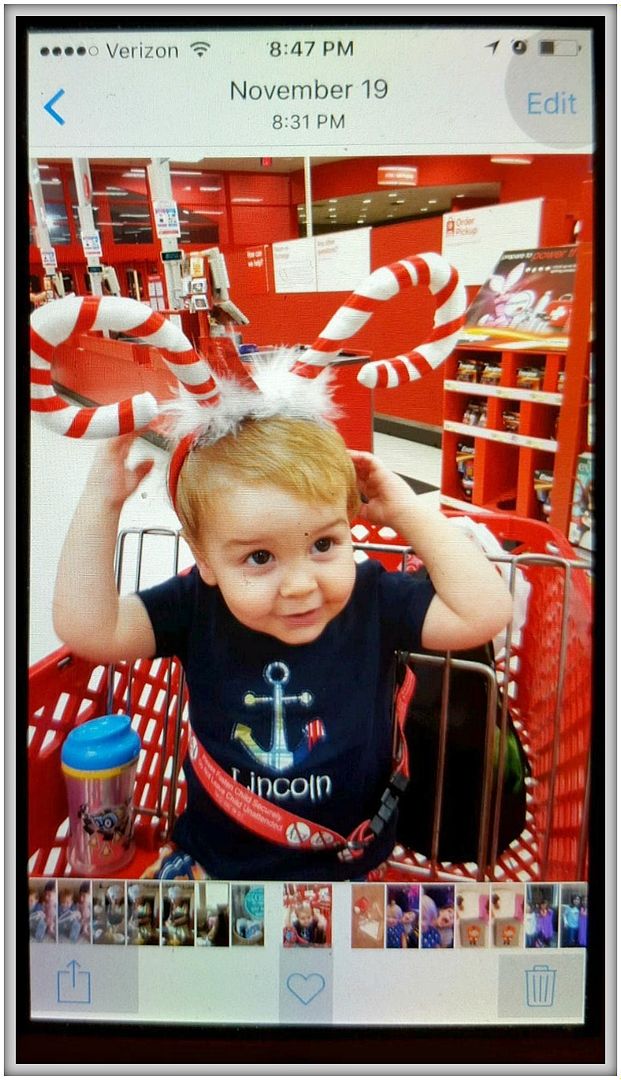
1. Open the App or screen that you are wanting to control. For demonstration purposes, I chose my “Pictures” App and then chose a specific picture inside. Lincoln likes to look at photos, and can scroll by himself, but often ends up deleting or editing by accident!
2. Click on your “Home button” 3 times in a row. A little box will pop up quickly that says “Guided Access Started.” Click on the “Home button” 3 more times and it will ask you for your password. Put it in.
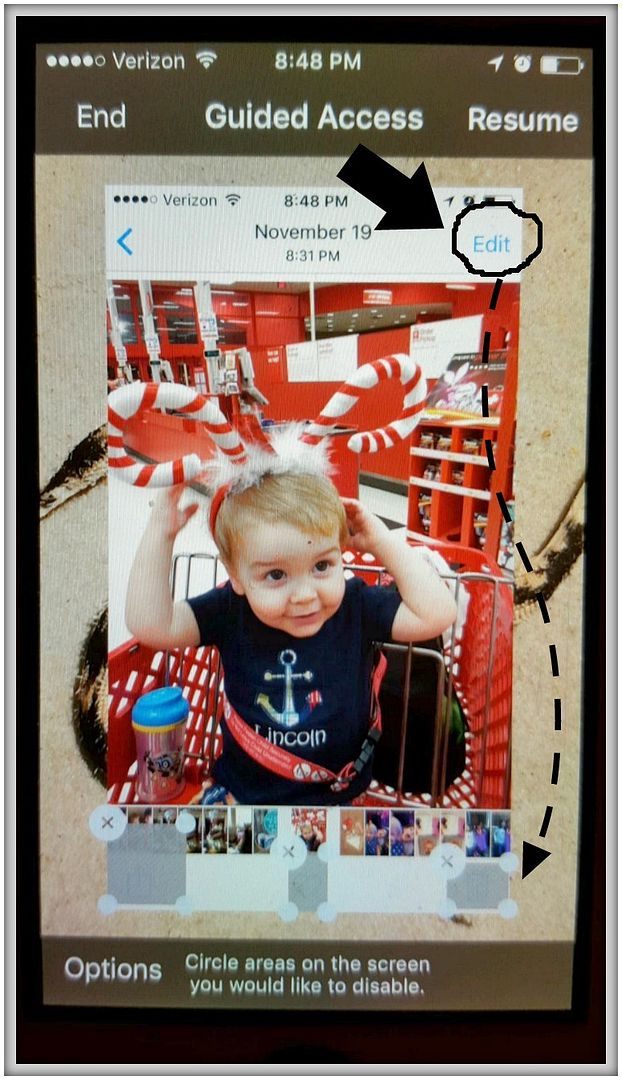
3. The screen above will pop up. Any areas that you want disabled on your screen, circle with your finger. As soon as you circle it, it will turn into a gray box to show you the area that is disabled. Use the X to delete the area if needed, and the white balls in the corners will adjust the size of the box {keep it as small as possible!}. When you are done, click on “Resume” at the top. Your app is now ready for your kid to use!
4. If you want to turn off the gray boxes {and make those areas clickable again}, hit your “Home button” 3 times again and enter your password. Then click on “End” in the top left corner. You are Ending Guided Access. From now on, every time you open that particular App {in my case, My Photo Album App}, just click your Home button 3 times in a row to start Guided Access. If you need to adjust your gray boxes, just click Home 3 more times to enter your password and edit.
DONE!
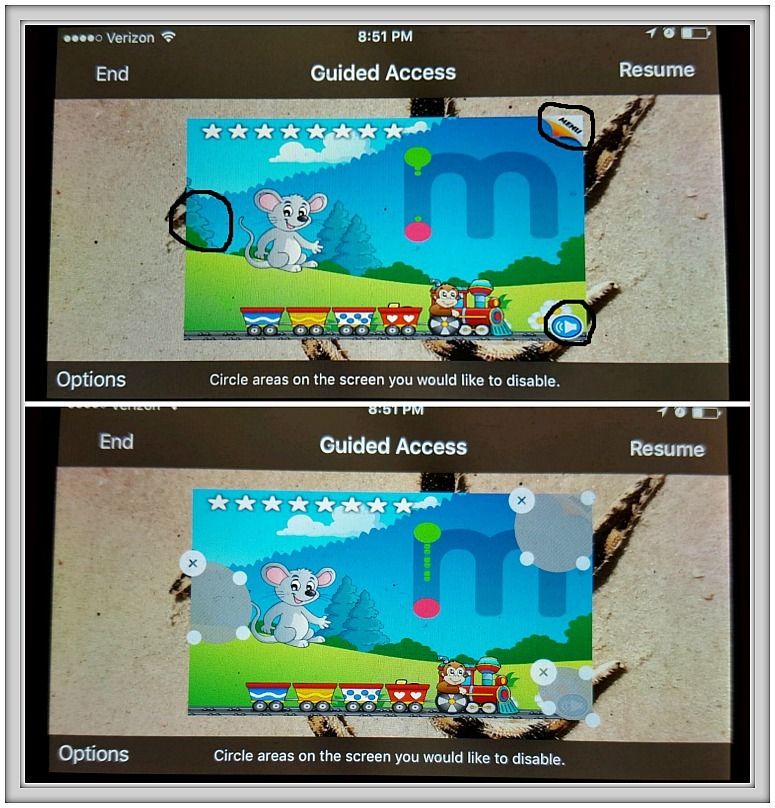
Above is another example of the gray boxes on an actual game App. Since the App has screens that change, I had to get a little creative…See the gray box on the left side of the screen? It looks like there is nothing to control there, but in actuality, that is where the “In App Purchase” box pops up…so I disabled the BUY NOW area. I also ended up making my gray boxes much smaller to just cover the icon…If you leave them too large, they may cover up a game option or answer on another screen.
Although I only have a couple of simple games on my phone for my kids, I went ahead and spent a couple of minutes setting up Guided Access for each app. So now they are all ready for my kids to use {just hit HOME three times!}.
BRILLIANT.
Hopefully this tutorial on how to kid-proof your phone helps save you money from inadvertant in-app purchases, and saves your precious photo memories from being deleted or edited! Please click below to share and pin!


")
